A Complete Guide to Deploy your IOS App | Deploy your App using TestFlight| Part 3/4.
For all the new readers, this blog is a continuation of A Complete Guide to Deploy your IOS App | Introduction | Part 1/4 and A Complete Guide to Deploy your IOS App | AdHoc Custom Deployment ( Skip Testflight and Test your app on the go )| Part 2/4.
In this series, we are discussing how to deploy an IOS app and make it available to others to test. In part 1, we have discussed the summary of this series and in part 2, we have discussed the way to deploy the app using a custom AdHoc way without buying any subscriptions for the Apple developer program.
This blog is specific to deploying your IOS App using TestFlight.

Why TestFlight?
( Please read this section )
TestFlight is one of the ways to make your app available for users to test and provide you feedback before releasing your app to the App Store. To deploy the app on the TestFlight, you need to enrol on the Apple developer program. Country-specific, there are charges to subscribe to the Apple developer program. In the ad hoc custom way, we needed the UDID (iPhone device ID ) of the users and a third-party app like Diawi. This is a simple way but needs a lot of extra effort to test the app. For every new user to test the app, we need to collect their UDID and then register that to the App Store Connect.
To simplify this, we will use TestFlight. There is no need to collect any UDID from any end user. We need to create a beta tester group and send them an invite. Based on the invite they can test the app.
The way it works is below :
- End Users need to have the TestFlight app.
- They need to have an Apple Account which they need to share with the App team.
- The App team will create a group and add the trusted users with their details.
- Now, whenever a new build is released for that bundle of the app, every user will receive an email from Apple, asking them to update the App, mentioning that a new beta version is available.
This creates simplicity and needs no manual effort to collect UDID.
Now, Let's see the steps involved in deploying the App using TestFlight. Some of the steps are similar to Part 2. I am repeating them here as well, to keep the flow.
Step 1: Setting things up
- Make sure your Xcode version, IOS version and macOS version should be in sync and supporting each other. (No compatibility issues)
- Open your app in XCode. To do this, it is very important to open the workspace file which is inside the IOS folder. Do not open the .proj file.
- Make sure you have purchased the Apple Developer program.
- Login with an Apple developer program account in XCode. You can log in by going to Settings and then Accounts. Make sure you have logged in with the account which has the developer program enrolled.
Step 2: Setup app groups and bundles
This is a very vast step to cover. Apple has its own policies and rules for you to build an IOS app for deployment. We will cover all of the details in Part 4. This part will help you to get direct insight into each steps in simple ways.
- Once we have the workspace ready in XCode as done in Step 1, sub-step 3, click on the project parent folder name.
- Once clicked, you will see options for General, Signing and capabilities, build settings, etc.
- Now, In Signing and Capabilities, Fill below details at must.
Fill in the Below Details in Signing And Capabilities.
- Team — this should be your account name.
- Bundle Identifier — Add a unique identifier name. Note this down, you will need this in the below items as well. (Details and why in part 4 :) )
- App Groups — Add a unique group name. A group can contain multiple bundles. (Details and why in part 4 :) )
- Targets — On the left side, you should see a Target Column. The data you filled in above should be for the first option. Please fill same details, exactly the same, in the other 2 options. They could be Test and BroadCast Extension options.
- Check Embed App Extension (very important) — Select the First Target and then go to Build Phases. Now, expand the Embed App Extension Accordion and check the option Copy only when installing.
Step 3: Update the App Name and App Icon ( Mandatory Step )
- Open Information Property List file (info.plist)
- Update App Name — Look for the key ‘Bundle Display Name’ and update the app name here. You can add a string as well as a variable here.
- Update App Icon — Open or create a .xcassets file. This file will be under your project folder. More details below.
Updating App Icon :
- Update the App Icons folder name. Usually, it is set to ‘AppIcon’. You can change this to your desired name. Once renamed, you have to update this name in the Info.plist file under the App Icon key.
- Now, create your App Icons from your desired Apps. To simply create app icons, I would use the App Icon Generator app, which provides you with app icons of different resolutions needed for your IOS App. It helps you extract the .xcassets folder and directly put it here.
Step 4: Create an archive of the App
This step involves verifying your App groups and bundle names based on your Apple account. They should be unique as mentioned above. We have already done this step above.
Then it creates a build for the App. I have covered all the steps needed to avoid any errors. In case of any error, please search on Google once or comment here in this post. I will check in my Error Dictionary and get back (Working on this — releasing soon — An App that will be a dictionary of errors which can help devs to work faster).
Then it creates an archive. Lets see the steps involved.
- Go to Product and click on the Archive option.
- A process will start which will build the app and then archive it.
- Once Archived, you will see a popup like below. Here it will ask you to select an option for distribution. Select TestFlight Internal only.

4. After you select the TesFlight Internal Only, it will start running a few mandatory checks.
a. App Icon and App Name check
b. Apple developer Enrollment check
c. Bundle and identifier check.
5. Once the above three checks are passed ( and please read above to know how to achieve them ), the app build will be uploaded to the App Store Connect.
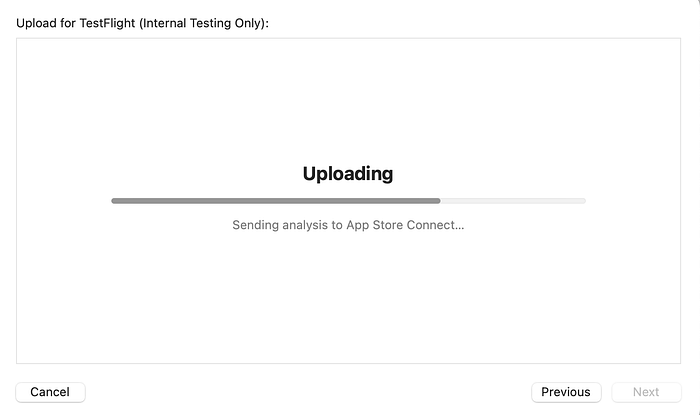
6. Once uploaded, it will prompt you with the below message —
<App-name> uploaded. Monitor the status of your app on App Store Connect.
Step 6: Monitor the build
Once we get the above prompt, log in to the Apple developer account and go to the App section where all builds are mentioned.
Here, your build will fail building due to Apple compliance. You need to agree to some terms and conditions and continue.
After this, the app build will complete and in not more than a minute, the internal test users which we registered above, will receive an email prompting the update.
Now, every time you publish a new build, automatically all the users will be notified.
This was all about the IOS deployment process. This series only covers the test deployment process. So soon, we will go through the release process and deployment on the App Store.
This is not the end, yet !!
In the next part, I will provide a glance at the basic understanding of bundle IDs, groups, signing and capabilities. Believe me, this is as important as it was to deploy the app.
Coming up next :
- Part 4 | Sunday, Nov 12, 2023 — More Insights into App groups, App bundles, Signings, etc.
Thanks,
Hariom Sinha | Developer | Learning And Growing
New Blog drops every Sunday